|
|
Post by halay on Dec 20, 2013 6:27:09 GMT
I am new to this wonderful forum and an ardent felter. You have given so much useful advice so far and I have learned a lot. I would like to make a scarf-collar which should look something like this:
www.thisnext.com/item/76D54D42/Rudman-Felted-scarf-collar I have done some smaller projects in nuno felting technique. My problem is that I don't know how to lay wool on silk to get ruffles in the end. Do I need to cut out silk scarf with rounded edges? What shinkage percent should I take into account? Well I think I need detailed instructions. Can you help me? |
|
|
|
Post by Shepherdess on Dec 20, 2013 14:26:42 GMT
Hi Halay the link is not a nuno felt scarf. However I can tell you how she got the ruffles. The wool around the outside is laid out perpendicular to the edge and then in the middle it is parallel to the edge. The middle then shrinks along the length and the edges shrink towards the middle and you get ruffles. If you want it to be stiff like the one in the link you need to do 3 layers with the middle layer going the opposite way. You need most of your wool going in the directions I told you at first. You can add a silk layer if you like and it will still work the same way. With merino wool I would say between 30% and 50% shrinkage depending on how much you full it.
I hope that makes sense. If not ask and we will try to explain it better.
|
|
|
|
Post by MTRuth on Dec 20, 2013 16:08:23 GMT
Ann has explained the ruffling process so I hope it makes sense. The direction you lay the wool fiber makes all the difference. Welcome - I hope you will share photos of your finished scarf.
|
|
|
|
Post by Pandagirl on Dec 20, 2013 16:39:57 GMT
Welcome Halay! I agree with shepardess Ann that it probably isn't Nuno with silk. However, it's not to say you couldn't make it Nuno. It would give it a little different look. Perhaps you could make a sample first with some similar wool taking measurements and notes as you go. That usually works for me. However sometimes the wool and conditions have their own ideas. :-). Good luck, it looks like a lovely Project. Please share your findings as you go.
|
|
|
|
Post by koffipot on Dec 20, 2013 16:47:06 GMT
It does say it is made on a lace and fabric base, so strictly speaking the central part is nuno. However the fibres would still be laid as Ann has said.  If you're going to use a lace fabric, you could round the corners off a bit, then follow the curve keeping your edge fibres at 90 degrees to the fabric. Look forward to seeing your collar. Oh yes, and welcome. |
|
|
|
Post by zed on Dec 20, 2013 17:00:03 GMT
Hi Halay, welcome to the forum Ann, did you click the link to get it bigger? I think that's a strip of fabric in the middle. Depending on how many layers/how much you full it and what kind of fabric you use will all affect the shrinkage, Halay. I'd recommend a test piece, but it's so small you might just have to try it and tweak it. I'd follow Ann's suggestions and lay the fabric strip on top in the centre. Using a template or two could help. Mark the section in the middle where you want your horizontal layers, then the area around depending how deep you want your vertical layer for ruffles. An identical template with the centre cut out, maybe slightly larger than where you need to do your top horizontal layer, could be used on top to guide where to do the top horizontal layer. ( I hope I've got my horizontal and vertical right!) Like these:   |
|
|
|
Post by halay on Dec 20, 2013 18:28:41 GMT
Ladies, many thanks to all of you for your quick response. One more question: Do i need to fold back the ends of wool on the edges? I think I will try with a small sample and if the real project comes out OK, I will show you a picture. Lately I have been making fingerless gloves and lots of slippers. My photos are on my computer, I need to find a way to put them on the internet. |
|
|
|
Post by Shepherdess on Dec 21, 2013 2:39:14 GMT
Hi again, I didn't read the description carefully enough. Trying to do to many things at once I suppose. You can fold the ends over if you like but you don't have to. It will look a little different each way. I forgot to say be careful to make sure your wool is all overlapping well if you are not doing a middle layer going the other direction.
please post some pictures of your work. fingerless mitts seems to be about all I have done lately.
|
|
|
|
Post by koffipot on Dec 21, 2013 7:16:50 GMT
Halay, I just gently push the wetted edge fibres to tidy the stray ends. Do you use Flickr? It's an easy way to share your pics on here - and we know it really is easy, because even I can do it! www.flickr.com Zed, the diagram was a good idea, why am I not surprised it was you who came up with that!!  |
|
|
|
Post by halay on Dec 22, 2013 7:19:06 GMT
Hello everyone, thanks to your kind help and all the instructions you shared with me, I need to report on the outcome of my scarf-collar: The first picture shows laying of wool. Follwing zed's advice I used a template. I simply drew the shapes on a piece of a thin plastic sheet onto which I placed wool. My target size was 60 x 15 cm. I enlarged the template by 30% on the account of shinking. On the edges i folded the wool in and made just one layer, while in the middle I made three layers (two running horizontally and one vertically). Consicering this was my first such project I am quite pleased with the results, although the ruffles are uneven on the edges. I believe that during the first stage of felting I should taken more care about this by moving the fibres in proper place. I would appreciate your comments. Thanks again to all of you. 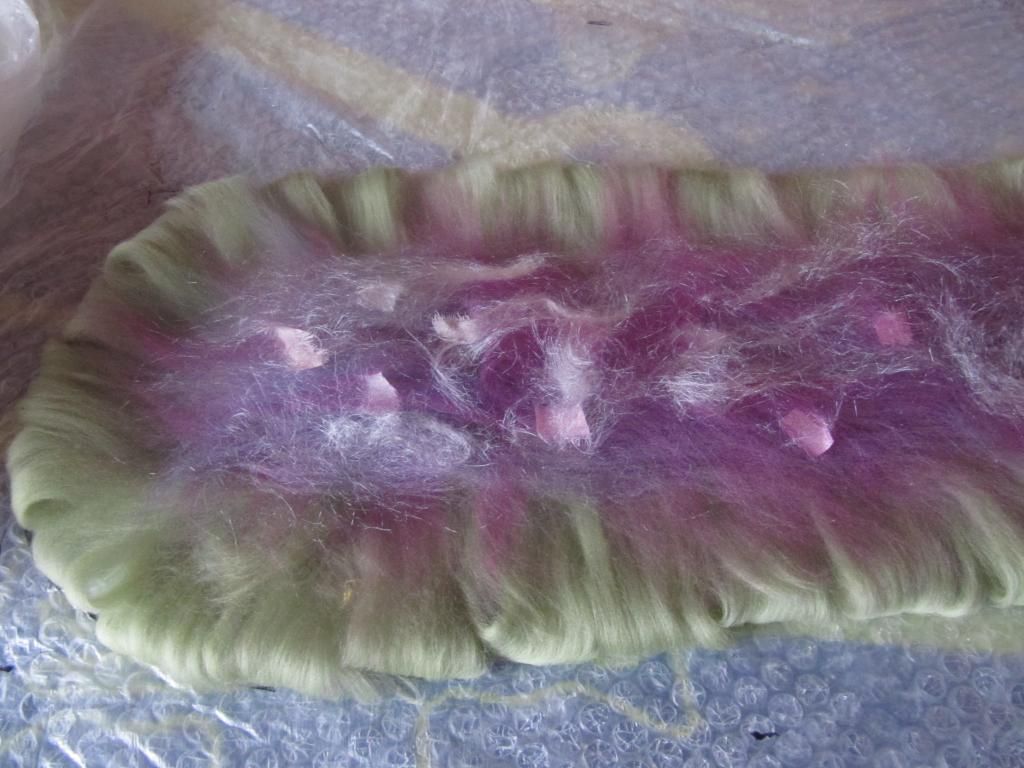 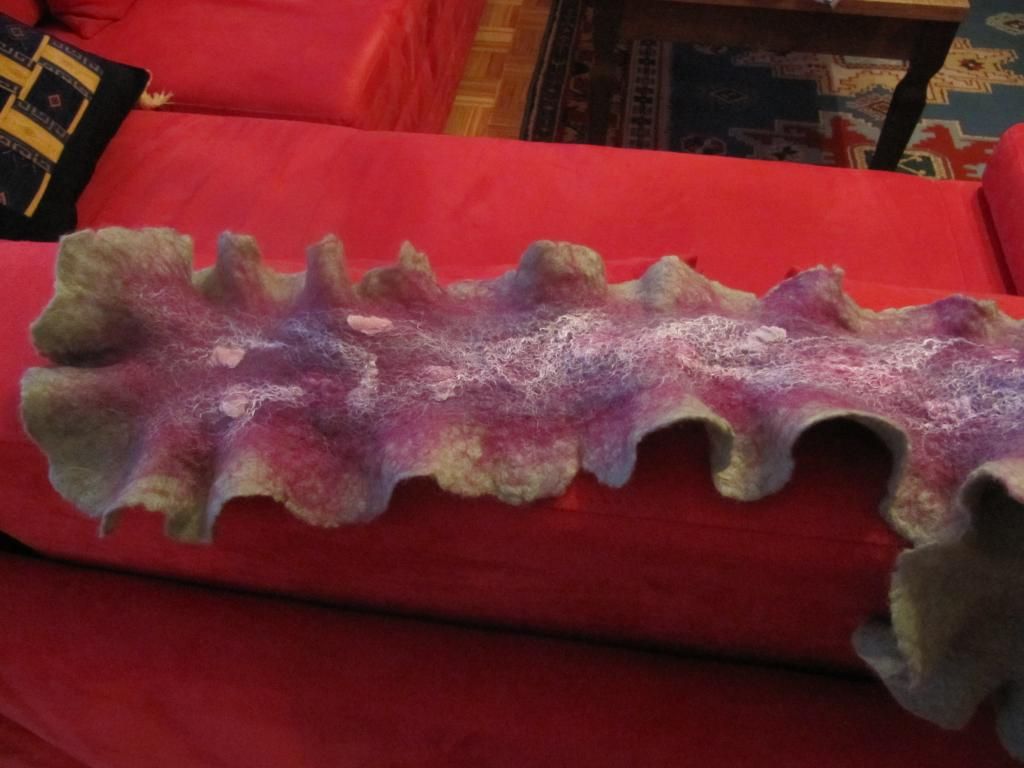 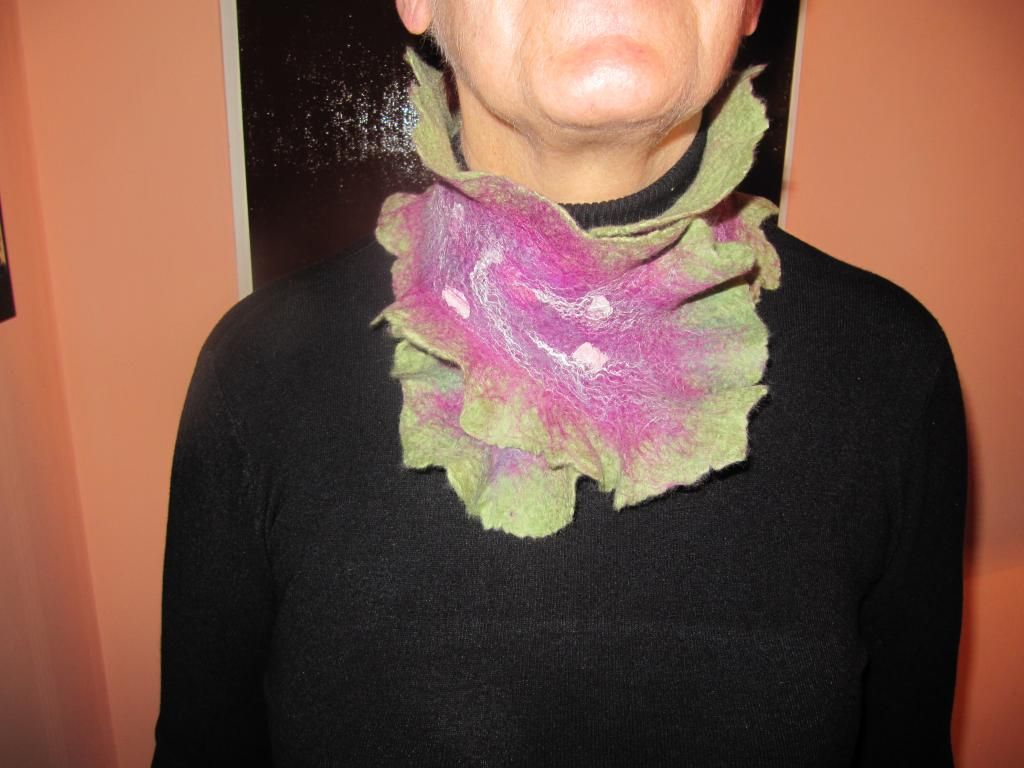 |
|
|
|
Post by koffipot on Dec 22, 2013 8:18:47 GMT
You've achieved some very good ruffles there and the collar looks great. You should be pleased with yourself. I like the organic edge which makes me think of leaves. However, if you wish to achieve a straighter edge as in the spiral scarf below, I've put some notes below, hope you can make sense of them! I may be able to do a tutorial now that Lyn has sent me a 'round tuit'!! www.flickr.com/photos/koffipot/6486639409/I like to keep the middle fibres quite thin which means you get more shrinkage on the length, making it easier to get the ruffles. I don't fold the edge fibres but after covering, wetting and a little gentle rubbing, lift the net and with just one finger, gently push the stray fibres to create a straight edge, then cover again and continue the felting process, checking the edges now and again. During the fulling process, give the centre panel a few tugs across the width, which encourages more ruffles and tug the ruffles into shape. Once in shape, leave to dry, then steam iron the edges with arcing, movements. Hope this is of help. |
|
|
|
Post by lyn on Dec 22, 2013 10:59:09 GMT
Lovely collar Halay!
Looking forward to the tutorial Judith (gorgeous scarf pic in flickr).
|
|
|
|
Post by koffipot on Dec 22, 2013 11:51:50 GMT
Thanks Lyn, Tuts. are not my forte as I forget to take enough pics!! I'll give it a try though.
|
|
|
|
Post by halay on Dec 22, 2013 11:53:57 GMT
Thanks koffipot for the instructions on how to keep the edges straight. Your scarf is so beautiful! Also looking forward to your tutorial.
|
|
|
|
Post by zed on Dec 22, 2013 12:22:56 GMT
The scarf turned out great, Halay That's a beautiful scarf, Judith, I hope you do write a tute! I've never seen wool folded like that before, Halay, does it stay in place easily? I tried folding back wet edges years ago, but they always stayed 'puffy' for me. Now as soon as the piece is all wet, I lift the netting on the back and push all straggly fibres to the right with soapy fingers, then work around the edges pushing the fibres in, and work with a bit of a circular motion. It can take a long time. |
|


