|
|
Post by lomahfelt on Aug 2, 2019 1:47:57 GMT
I have just started to try making very fine felt with the idea of achieving a very light weight floaty fabric that could be worn here in spring/autumn - it gets way too hot here in summer to wear wool during the day. My samples are scarves - lol if they work out then they are usable, if not then I can re invent and haven't wasted too much time or materials. I followed a tutorial for a cobweb scarf where a length of tops is simply stretched out very thin across work table, allowing holes and thin patches... I don't really like what I achieved...maybe I could have spread it finer?...poked some bigger holes in it?...not fulled as far? How do people achieve those very open lacey scarves and wraps?...I'm always a little nervous to use too little fibre...thinking it will just be a mess of holes!!!...but is this exactly what I need to do?...on the other hand |
|
|
|
Post by lomahfelt on Aug 2, 2019 1:53:06 GMT
hmm...not sure what happened to my other question...it read..on the other hand where it is not holey i like the fine felt...does anyone make garments using this type of layout?...wondering if it would work
|
|
|
|
Post by felicity on Aug 2, 2019 6:58:42 GMT
|
|
|
|
Post by lyn on Aug 2, 2019 7:03:43 GMT
Here's a couple of ideas:
Annie and I made some cobweb scarves using yarn and merino wool. Sorry I can't provide a photo as it was about 11 years ago and we didn't think photographing everything was important (Duh!)
Very, very fine 'pulls' of merino wool fibres were laid out in a scarf shape - we used a paper template under the bubble wrap.
Then the yarn (a thin handspun 100% wool, not commercially spun) was cut into lengths then laid out like a skeleton scarf on top of the wisps of merino wool - 4 long lengths about 7.5cm (3") apart with shorter lengths crossing the long lengths at right angles every 10cm (4").
On top of the yarn, very fine 'pulls' of merino wool fibres were laid out with the fibres running at right angles to those on the bottom layer.
The yarn was multi-coloured and we used a few different colours of merino wool.
Felting was slow and gentle to start with to give everything a chance to felt together.
Tip: After rinsing, spread the scarf out to dry naturally - don't spin it in a washing machine.
Another idea is to pull a fine tuft of fibres then mess it up (tangle it) between your fingers to get a 'puff' of fibres.
Lay a load of puffs down, some slightly overlapping and some not. We used a paper template under the bubble wrap to guide the placement of puffs. Cover the puffs of fibres with a piece of ironed scrim - natural or dyed - not quite reaching the edges of the puffs.
Make another layer of puffs on top of the scrim.
The trick is to make the puffs so fine that you think it's not going to work, but it does. The scrim provides strength and where it shows between the fibres it looks good.
|
|
|
|
Post by Antje on Aug 2, 2019 8:01:48 GMT
My only contribution is to suggest that you practice making it thinner and don’t full too hard.
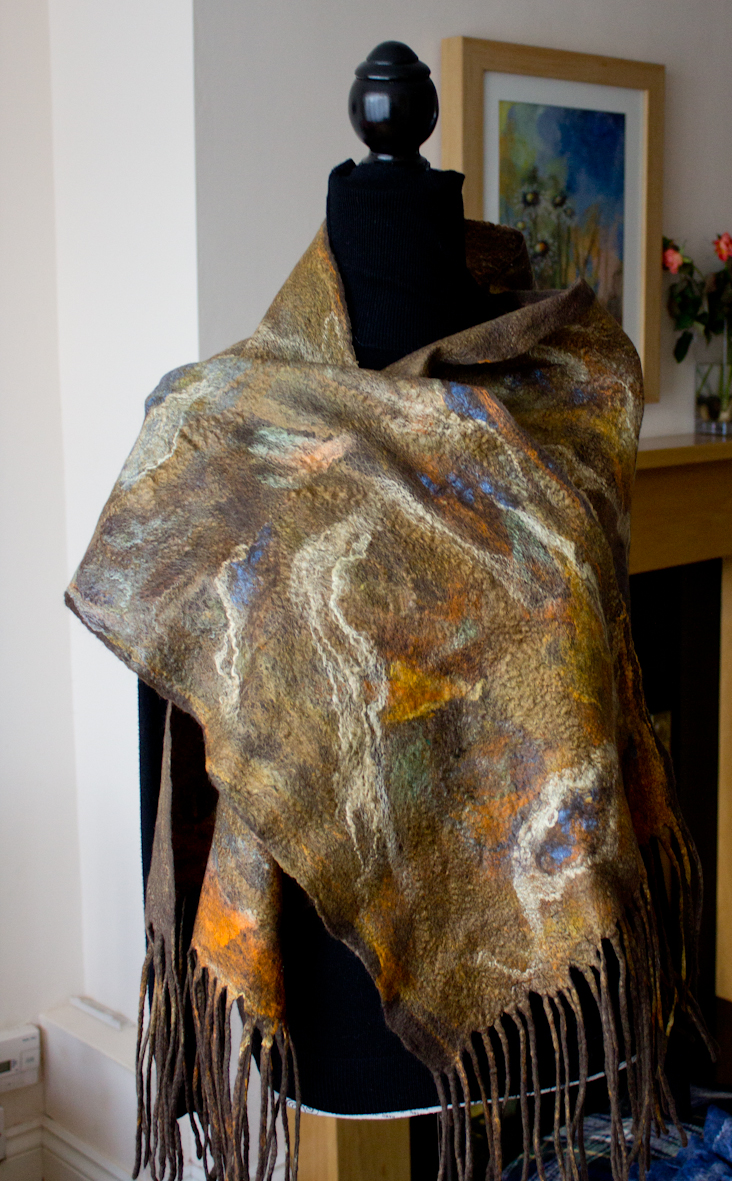
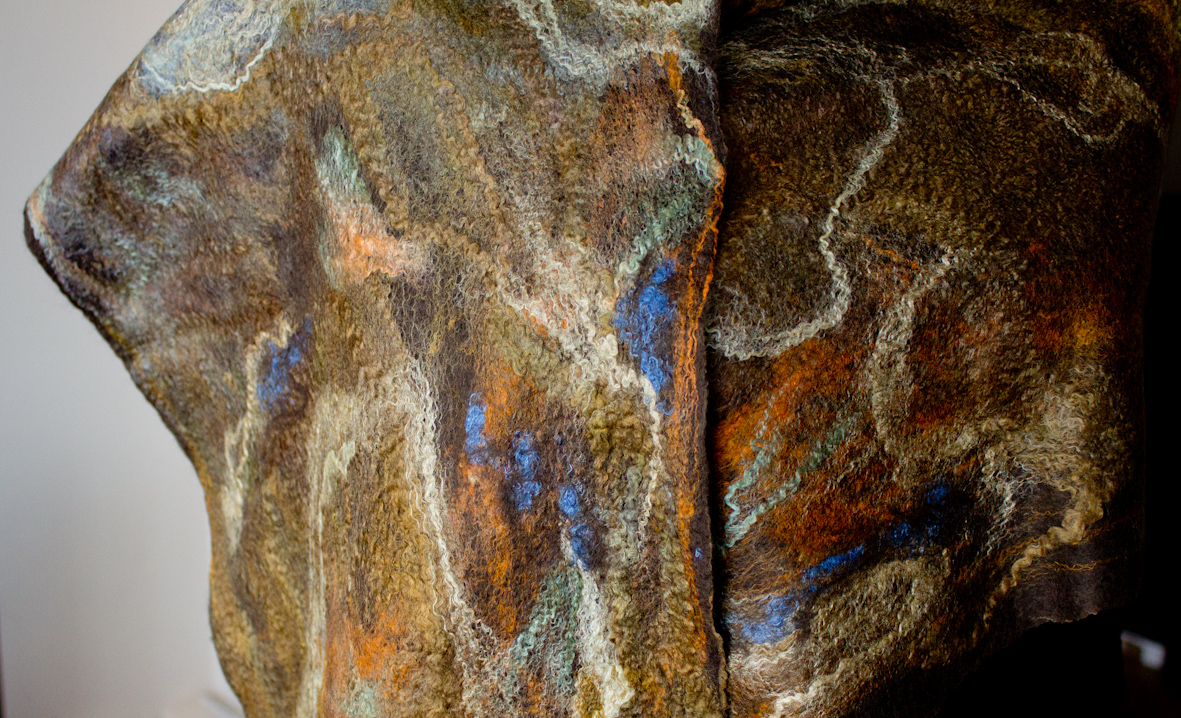
Galina - I like your scarves particularly the colours of the top one (olive green, orange & blue).
|
|
|
|
Post by lomahfelt on Aug 2, 2019 9:38:42 GMT
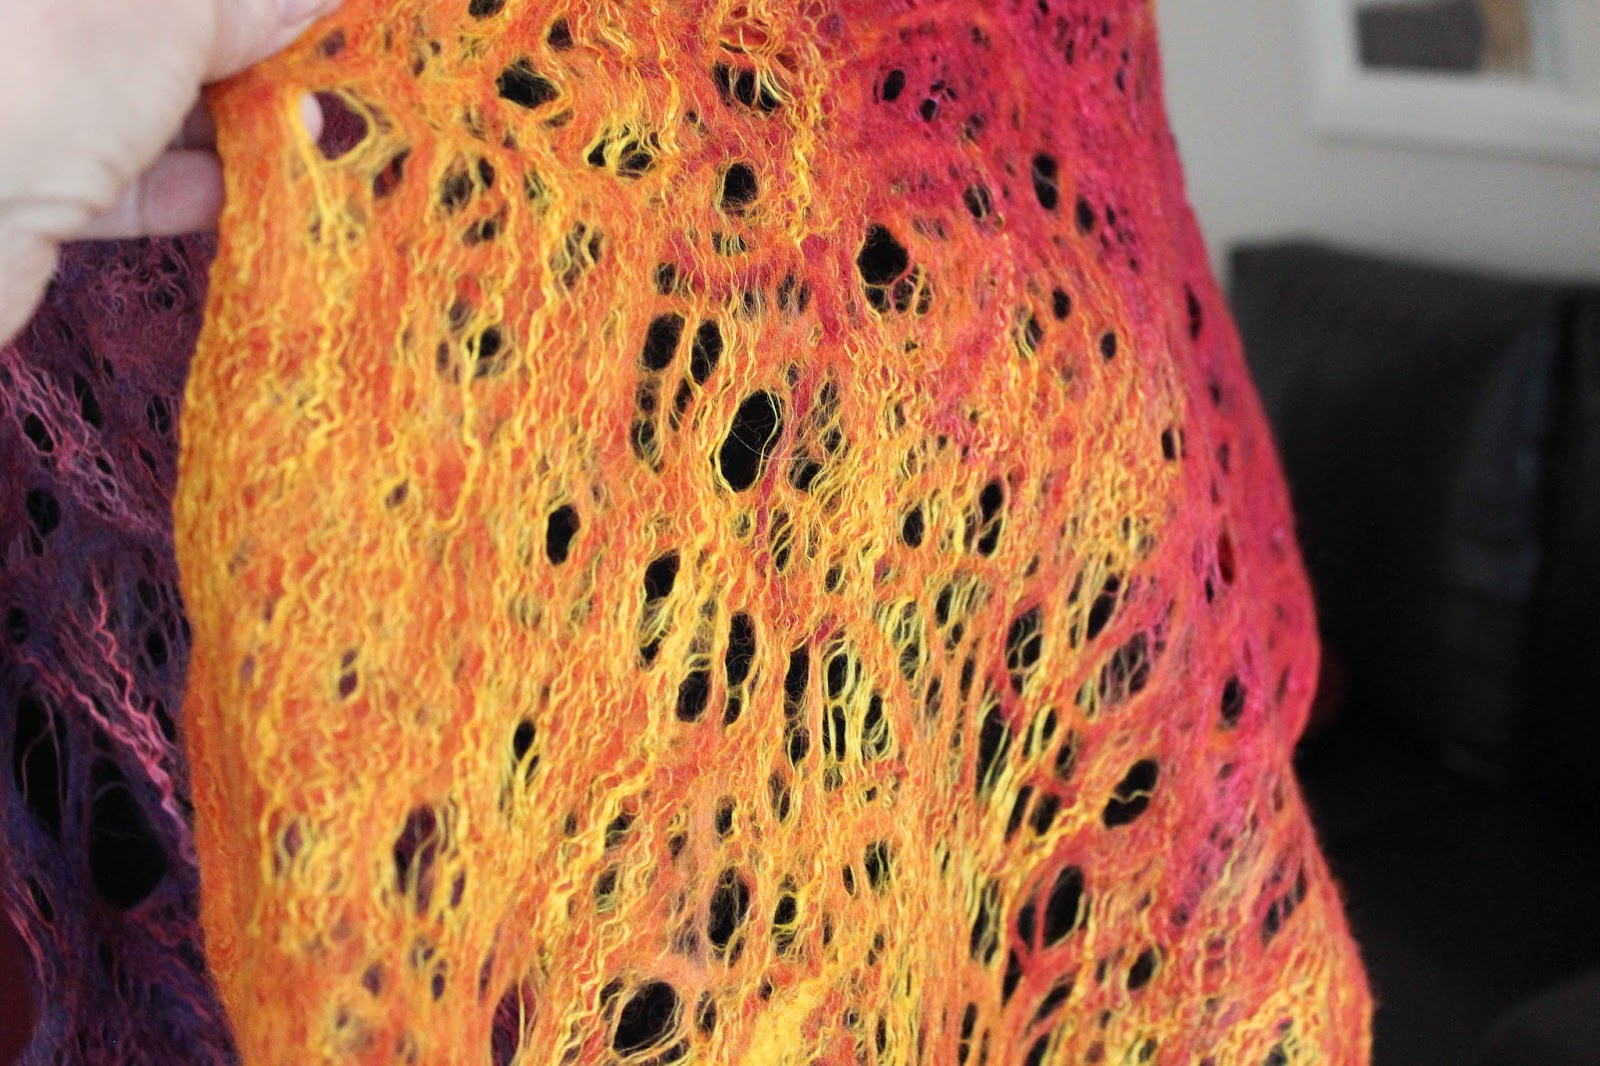
Thanks for sharing your pictures felicity...it makes sense to me now...the effect I thought I was going to end up with was like your pencil roving one...what I made was more like your top example...but I went and made some holes in it (then wished I hadn't!!)two more questions now:1) with the pencil roving one have you only used pencil roving or is it a combination with yarn and/or fibre? 2) with your top example, how do you think this would go as a way to layout perhaps a summery tunic/dress? Lyn, I think I will try both these methods. with the tangled puff method, I assume this would work on silk gauze the same...I have never got around to buying scrim, but have just ordered a huge  amount of silks from China And yes Antje...perhaps the best advice...practice practice practice...I have seen so much mentioned about felt not being fulled enough that I tell myself..."must properly full it"...I am largely teaching myself/ looking on internet/(and have done a couple of workshops)...but still not sure 'when it is done'...am I right in thinking for wearables the surface should be slightly bumpy - like a bowl of porridge? |
|
|
|
Post by felicity on Aug 2, 2019 9:43:37 GMT
Galina - I like your scarves particularly the colours of the top one (olive green, orange & blue). Thank you Antje! I made this one on a workshop and then made a few more even thinner and with more silks. They looked nice and sold well. Then I've moved to another things  |
|
|
|
Post by lomahfelt on Aug 2, 2019 9:47:56 GMT
Lyn I have found a way to do away with those paper templates for flat pieces.... I have a large sheet of plastic that covers my worktable all the time...I draw my template on that with white board markers...I have a couple of different colours and have a few templates drawn now. I then have my usual bubble wrap on top...you can see the lines through the bubble wrap. The lines can be removed with a warm soapy rag if you want to start fresh
|
|
|
|
Post by felicity on Aug 2, 2019 9:54:32 GMT
1) with the pencil roving one have you only used pencil roving or is it a combination with yarn and/or fibre? 2) with your top example, how do you think this would go as a way to layout perhaps a summery tunic/dress? Lyn, I think I will try both these methods. with the tangled puff method, I assume this would work on silk gauze the same...I have never got around to buying scrim, but have just ordered a huge amount of silks from China 1) - I always use silk fibres to soften the wool (the pencil roving may be not of the finest merino), to add extra lustre and just to hold together the biggest holes. 2) - I've never made a garment so my opinion is purely academical ! I think it's ok for scarves but may be too flimsy for tunic etc and being so light it can stick to skin or underwear. Scarves you can drape very loose so they fold and drape better. As for a "summer felt" Russian felters (yes, again, but they make a lot of garments) use silk fabric of very loose weave as a sandwich with thin layer of wool between silks. |
|
|
|
Post by lyn on Aug 2, 2019 10:11:04 GMT
Lyn I have found a way to do away with those paper templates for flat pieces.... I have a large sheet of plastic that covers my worktable all the time...I draw my template on that with white board markers...I have a couple of different colours and have a few templates drawn now. I then have my usual bubble wrap on top...you can see the lines through the bubble wrap. The lines can be removed with a warm soapy rag if you want to start fresh Great idea! |
|
|
|
Post by MTRuth on Aug 2, 2019 16:06:48 GMT
I agree with the advice you have already gotten. The thin layout is the key for cobweb felt. I personally don't think cobweb felt is appropriate for garments except scarves. I think the best idea as Galina suggests is to use silk or silk fabric to achieve a lighter garment.
It always takes me a couple of times to make cobweb felt. I start out thinking I am laying the fiber thin enough but it never is. Then the second time, I can get it right and get the really thin layers needed. I like to do mine so the fibers are laid randomly instead of all in one direction.
|
|


 amount of silks from China


