


Post by halay on Nov 15, 2015 12:40:14 GMT
I would like to encourage all those who are still afraid of making slippers to make a pair. I have devised a model for mules type of slippers, very easy to make 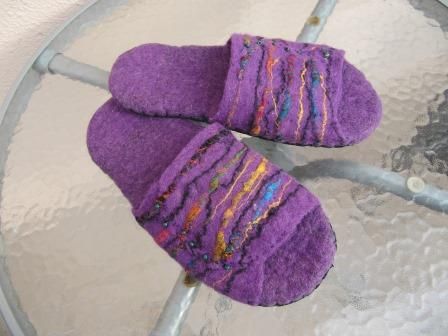 .
.
For this pair (shoe size 40) I used approx. 180 gr of wool and started with a simple template as this one in the picture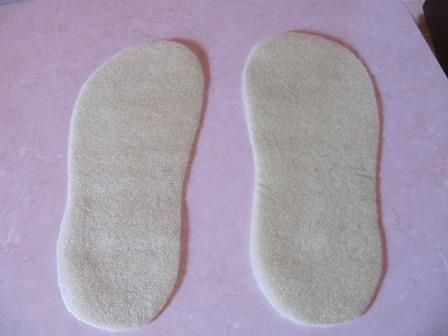 . I laid wool in the usual way, i.e. on both sides of the template (usual method when using a resist) and when I felt there was enough wool for the soles I proceeded to making the top part.
 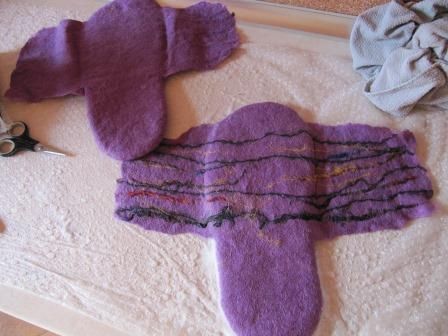 As you can see in the picture added a kind of "wings" on each side but I did not make them as thick as for the soles
 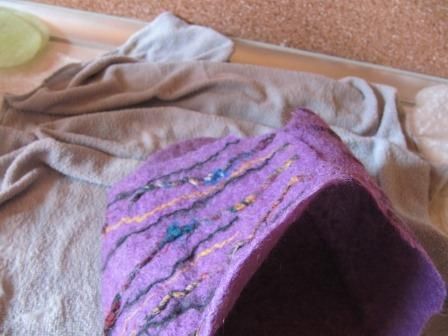 . In this way I got a kind of aeroplane shaped form. What is important is that you need to lay wool for the wings on both sides of the sole (top and bottom). After that I started felting, making sure that the wings adhered well to the sole. When the felt became stiff I turned the slipper upside down, the bottom part facing up and made a slit so that I could take out the template
  . To cover the slit I added a little bit of wool and needle felted it over the opening. I kept on felting the soles so that the wool inside merged together well.At this point it is not necessary to worry about the shape of the wings. Later, during shaping they will be trimed anyway.
The following stage, i.e. fulling was done by rolling the slippers in a wet towel in all directions. I folded the wings and rolled and rolled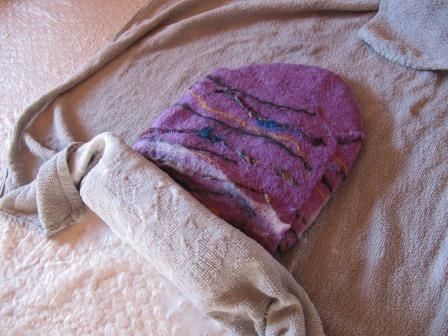 It is necessary to roll in all directions changing sides
  . When you have reached the desired size you can start shaping the top. I took a pair of lasts (or you can do that directly on your feet) and folded the wings on the top
 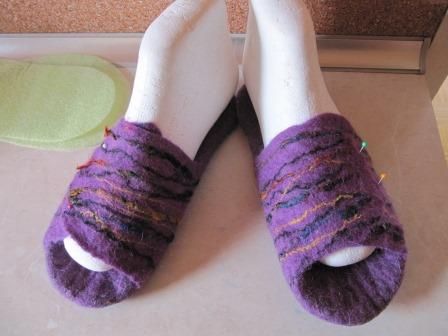 . At this point you can trim the wings as necessary. After that I put each slipper in an old pantyhose and made a knot on each end and put them in the washing machine (short cycle, 30 degrees, short centrifuge). While they were still wet I shaped them and left them to dry. The upper part (the wings) were stitched to hold together.
I don't know if I made myself clear, please ask questions.
 .
. For this pair (shoe size 40) I used approx. 180 gr of wool and started with a simple template as this one in the picture
 . I laid wool in the usual way, i.e. on both sides of the template (usual method when using a resist) and when I felt there was enough wool for the soles I proceeded to making the top part.
  As you can see in the picture added a kind of "wings" on each side but I did not make them as thick as for the soles
  . In this way I got a kind of aeroplane shaped form. What is important is that you need to lay wool for the wings on both sides of the sole (top and bottom). After that I started felting, making sure that the wings adhered well to the sole. When the felt became stiff I turned the slipper upside down, the bottom part facing up and made a slit so that I could take out the template
  . To cover the slit I added a little bit of wool and needle felted it over the opening. I kept on felting the soles so that the wool inside merged together well.At this point it is not necessary to worry about the shape of the wings. Later, during shaping they will be trimed anyway.
The following stage, i.e. fulling was done by rolling the slippers in a wet towel in all directions. I folded the wings and rolled and rolled
 It is necessary to roll in all directions changing sides
  . When you have reached the desired size you can start shaping the top. I took a pair of lasts (or you can do that directly on your feet) and folded the wings on the top
  . At this point you can trim the wings as necessary. After that I put each slipper in an old pantyhose and made a knot on each end and put them in the washing machine (short cycle, 30 degrees, short centrifuge). While they were still wet I shaped them and left them to dry. The upper part (the wings) were stitched to hold together.
I don't know if I made myself clear, please ask questions.


